Indexing refers to the movement of bottles or other containers into and out of the fill area of a liquid filling machine. Using one of several methods, the indexing system will move one bottle under each fill head on the machine. Once the bottles are in position, they will be held there until the fill is complete. The bottles will then be released to move along the power conveyor to the next packaging machine. Proper indexing, be it through pins, a star wheel, a screw or some other method, is crucial to the efficient and reliable performance of an automatic filling machine. Without proper indexing, a packager can expect inconsistent fills, bottle jams, spills and other unwanted occurrences. Luckily almost all automatic liquid fillers include settings in the PLC and operator interface to make finding the correct indexing settings simple.
Before we get to setting the actual indexing times, there are several physical adjustments that will need to be made when running a bottle or container the first time, or when switching from one bottle to another on the detergent filling machine. The guiderails on the power conveyors that move the bottles into the fill area will need to be adjusted for the container being used. Guiderails that are too tight can hinder the progress of containers on a conveyor, slowing down indexing times. Set the guiderails at an excessive width and containers may tip or line up improperly under the fill head. This adjustment can be made by simply setting the container to be run onto the conveyor belt and using hand knobs to adjust the guiderail height and width along the conveyor system. The guiderails should provide support while also allowing the bottles to move freely down the line, just touching an area of the bottle that will provide the needed stability.
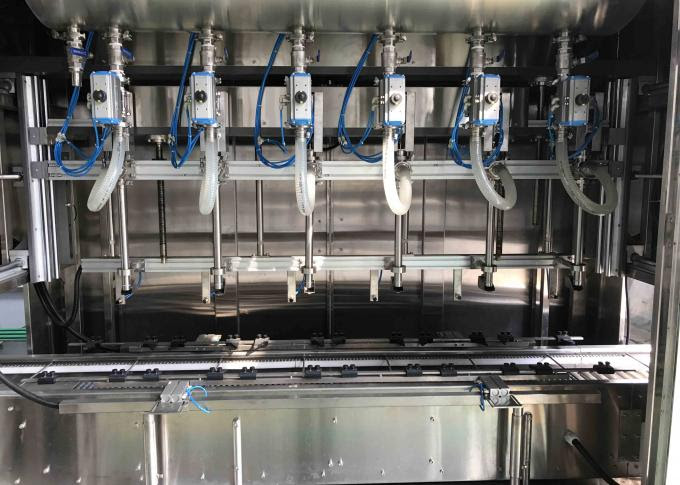
Once this power conveyors have been adjusted, bottles should be lined up in the fill area and under the fill heads. If moving from one bottle to another, the fill head position may need to be adjusted. This, again, is simple enough to achieve by loosening a hand knob and sliding the fill head into position over the line of bottles before re-securing the nozzle. Once the fill heads are all in position, some adjustment or changeover of indexing system components may also be required. For instance, if using pin indexing, the entry and exit gates will need to be relocated behind the first bottle and in front of the last bottle. These gates hold the bottles to be filled in place, but different bottle or container shapes and sizes will require different locations for the pins. This is usually accomplished by loosening a bolt to slide the pin into position. Star wheel and screw indexing systems may require changing out one star wheel or screw for one of a different size. Again, this is usually accomplished with the loosening and tightening of a few bolts.
Finally, once the indexing system has been set up, and with bottles still in place, the operator should add one additional bottle to the entry side of the filling machine. This bottle will be used to set up the count sensor of the filling machine. The count sensor reads each bottle as it passes into the fill area. When the right number of bottles have been “counted” the machine will activate the indexing system to stop bottles in the correct position and begin each fill cycle.
Once the physical aspects of the indexing system have been adjusted, the operator of the filling machine must find the indexing time for the container being run on the packaging system. Most automatic filling machines will include several different screens on the operator interface. There are a few settings to check before setting the actual index time. The operator interface will include an Infeed Container Count Preset, usually under an Adjust Presets screen. This is the number of bottles counted for each fill cycle. For most indexing types, this setting will be equal to the number of fill heads on the packaging machine. However, with star wheel indexing, it is normally set to one-half of the fill heads as the star wheel count works with the pins on the star wheel. Under the Filler Set Up screen, find the indexing type selection and ensure that the correct indexing is chosen (pin, star wheel, etc.).
The final step, then, is to set the actual indexing time, which on most automatic filling machines take significantly less time than the adjustments noted above. With containers lined up on the power conveyor, one for each fill head plus one additional conveyor, the operator will go to the Auto Index Set Up Menu. Once in the sub-menu, indexing times can be set for the specific container by pressing the Start ASU Index button. Containers will index through the machine and the sensor will close the gate to stop indexing once the correct number of containers have passed. This indexing time can then be saved or the automatic set up can be run again to get a different time.